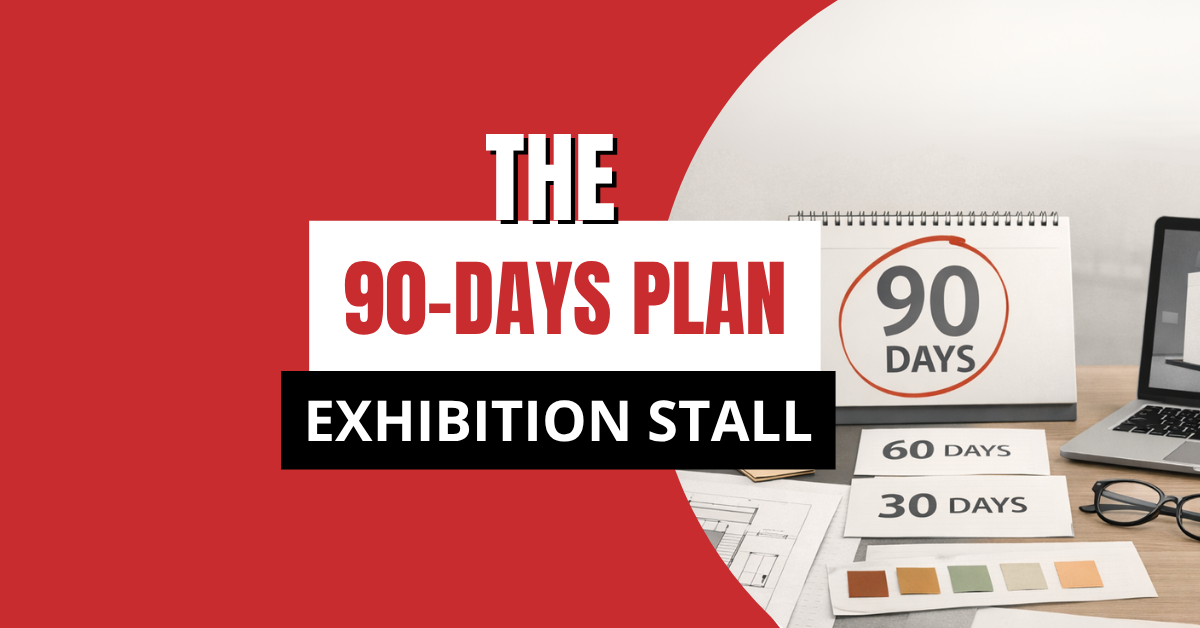
How Do You Plan an Exhibition Stall 90 Days Before the Event?
Planning an exhibition stall 90 days before the event is not about choosing colors, printing brochures, or approving 3D designs. It is about building a strategic roadmap that connects business objectives, budget allocation, stall design, marketing rollout, operational logistics, staff readiness, and post-event revenue tracking into one aligned system. Most exhibitors rush into creative decisions. Market leaders start with clarity. When you begin 90 days in advance, you move from reactive planning to controlled execution. You reduce last-minute costs. You increase lead quality. You create measurable ROI. This guide breaks down the most critical phase of your exhibition stall planning checklist: the first 30 days.
90-60 Days Before the Event – Strategy & Foundation
This phase determines whether your exhibition becomes a growth driver or just another marketing expense. The first 30 days are not about design. They are about direction. If this stage is weak, everything that follows becomes improvised instead of intentional. Let’s build the foundation properly.
1️. Define Clear Objectives (Replace Vague Goals with Measurable Targets)
One of the biggest mistakes exhibitors make is saying:
“We want brand awareness.”
That is not an objective. That is a wish.
Professional exhibition planning requires measurable outcomes. Before discussing stall layout or graphics, define exactly what success looks like.
Ask yourself:
- How many qualified leads do we want?
- Are we launching a new product?
- Is this event focused on distributor expansion?
- Are we aiming to close deals on-site?
- Do we want to schedule post-event demos?
- Are we strengthening relationships with existing clients?
Turn those answers into KPIs:
- 250 qualified leads
- 40 meetings with decision-makers
- 15% conversion rate within 60 days
- 3 strategic partnership discussions
- ₹X pipeline value generated
Without defined outcomes, your trade show marketing strategy becomes guesswork. Every design decision, staffing choice, and marketing activity must support these KPIs. Clarity creates alignment. Alignment creates results.
2️. Build a Smart Budget Framework (Not Just a Design Budget)
Most companies underestimate exhibition costs because they focus only on stall fabrication.
Exhibition stall budget planning must be comprehensive.
A professional budget should include:
- Space rental cost
- Stall design and fabrication
- Graphics and branding
- Shipping and logistics
- AV equipment and interactive displays
- Electricity and internet
- Staff travel and accommodation
- Promotional materials
- Pre-event marketing campaigns
- Post-event lead nurturing
- Contingency buffer
A Practical Budget Allocation Model
To maintain balance:
- 40% – Stall design & build
- 20% – Marketing & promotion
- 20% – Space & utilities
- 10% – Staffing & travel
- 10% – Contingency
This prevents overspending on aesthetics while neglecting lead generation and follow-up.
Remember: a beautiful booth without a marketing engine is a silent investment.
3️. Clarify Your Strategic Positioning
Before diving into a trade show booth planning guide, ask a critical question: Why should anyone stop at your stall?
Exhibition visitors make decisions within seconds. You are competing with dozens or even hundreds of exhibitors.
Define three strategic anchors:
- Your Core Message
A single, powerful sentence that explains your value. - Your Primary Audience
Be specific. “Manufacturers” is vague. “Mid-sized automotive component manufacturers looking to reduce production downtime” is precise. - Your Competitive Angle
Why choose you over alternatives?
This positioning will influence stall messaging, taglines on panels, demo content, staff conversations, and pre-event marketing campaigns. If messaging lacks clarity at this stage, your booth will feel generic later.
4️. Create a Structured Exhibition Success Framework
Industry leaders operate with frameworks, not assumptions.
A practical model to follow is the 5P Exhibition Framework:
- Purpose
Why are you exhibiting? - Positioning
What do you want to be known for? - Presentation
How will your stall communicate that visually and verbally? - Promotion
How will you drive targeted traffic to your stall? - Performance
How will you measure ROI?
This framework keeps your exhibition booth preparation timeline strategic rather than cosmetic. It ensures your stall is not just attractive but intentional.
5️. Map Visitor Psychology Early
Experienced exhibitors understand something critical: visitors are overwhelmed, they are tired, and they are selective. Your strategy must account for human behavior.
Define:
- What problem are you solving?
- What benefit can you communicate in 5 seconds?
- What creates curiosity?
- What visual or interactive element stops someone mid-walk?
This psychological clarity will influence:
- Stall layout
- Messaging hierarchy
- Call-to-action placement
- Demo scripts
- Staff engagement style
Design without psychology is decoration.
Design with psychology is conversion.
6️. Establish Lead Qualification Criteria Before the Event
Not every visitor is a prospect. If your team collects random business cards without qualification, your sales team will struggle later.
Define your lead classification system in advance:
- Hot Lead: Has decision-making authority, has budget, and has an active buying requirement.
- Warm Lead: Interested but researching, influencer or mid-level authority.
- Cold Lead: Student, vendor, competitor.
Create a simple scoring sheet or digital form that your team can use consistently. This step strengthens your exhibition lead generation strategy and improves post-event follow-up effectiveness dramatically.
7️. Choose the Right Stall Format Based on Strategy
Now that objectives and positioning are clear, decide your stall format:
- Custom-built experience-driven structure
- Modular reusable stall
- Hybrid solution
This decision should align with:
- Your exhibition frequency
- Budget allocation
- Brand positioning
- Product launch requirements
Never choose based only on visual appeal. Choose based on long-term strategic value.
8️. Establish a Realistic Execution Timeline
With strategy defined, create your internal calendar.
Confirm:
- Design approval deadlines
- Fabrication start date
- Marketing campaign launch date
- Staff training schedule
- Logistics dispatch timeline
Your pre-event exhibition checklist should now feel structured, not chaotic.
When timelines are confirmed early, stress reduces and quality improves.
Why This Phase Matters More Than Design
Most exhibitors start by asking:
“What will the stall look like?”
Market leaders ask:
“What must this stall achieve?”
The first 30 days determine whether your participation will be reactive or results-driven. If you align objectives, budget, positioning, psychology, and lead strategy during this stage, every decision that follows becomes easier, faster, and more profitable. Competitive advantage is rarely created on the show floor. It is created quietly 90 days before the event.
60-45 Days Before the Event – Creative & Stall Design Planning
This is where strategy becomes visible. If the first 30 days were about clarity, structure, and business alignment, this phase is about execution with intention. Your exhibition stall now begins to take physical form, and the decisions made here will directly influence how visitors perceive your brand, how long they stay, and whether they convert into serious prospects. But let’s address a hard truth: many exhibitors invest heavily in creative design and still fail to generate meaningful business outcomes. Why? Because the stall looks impressive, but it communicates nothing powerful. At this stage, your objective is not to build a beautiful booth; it is to build a strategic environment that attracts, engages, and converts.
1️. Translate Strategy into Spatial Design
Before approving any 3D concept or fabrication plan, revisit your foundation:
- What is our primary objective?
- Who exactly are we targeting?
- What is our core message?
- What action do we want visitors to take?
Your designer should not begin with colors or textures. They should begin with positioning.
Ask critical questions during design discussions:
- What will a visitor understand in the first 5 seconds?
- Where does their eye naturally go first?
- Is the benefit instantly visible?
- Does the stall visually prioritise our core offering?
A professional exhibition booth preparation timeline ensures that design decisions are strategic not decorative. Design must serve business intent.
2️. Define Visitor Flow Through Experience Mapping
An effective stall does not leave visitor behavior to chance. It guides it.
Think in terms of three functional zones:
- Attract Zone
This is the outer layer visible from a distance.
It should create curiosity through bold messaging, lighting contrast, or a strong visual hook. - Engage Zone
This is where conversations begin.
A demo screen, product display, interactive panel, or brand representative typically operates here. - Convert Zone
A semi-private space for deeper discussions, pricing conversations, or scheduled meetings.
If your layout does not support these behavioral stages, engagement drops significantly. A strong trade show booth planning guide always includes traffic flow planning because movement influences interaction. Poor flow creates confusion,
Clear flow creates confidence.
3️. Establish a Clear Message Hierarchy
One of the most common exhibition mistakes is information overload. Visitors do not read panels; they scan them.
Your messaging must follow a layered structure:
- Layer 1 – Headline (Maximum 5 Words)
Big. Bold. Benefit-driven.
It should answer: What’s in it for me? - Layer 2 – Supporting Statement
A concise explanation of what you do and who you serve. - Layer 3 – Proof Points
Data, certifications, metrics, client logos, or awards.
This structured approach increases message retention and reduces cognitive overload. A cluttered stall weakens authority.
A disciplined message hierarchy strengthens positioning.
4️. Design for Interaction, Not Decoration
Static stalls blend into the background.
Interactive stalls create memory.
Ask yourself:
- Can visitors try the product?
- Can they see a live demo?
- Is there a touchscreen experience?
- Are you hosting short scheduled presentations?
- Is there a visual transformation or before-after demonstration?
Even simple interaction elements increase dwell time significantly. Longer dwell time increases trust, and higher trust increases lead quality. Your exhibition lead generation strategy becomes exponentially stronger when visitors engage actively instead of passively observing.
5️. Integrate Lead Capture into the Layout
This is where many exhibitors disconnect creativity from results.
Lead capture should never be an afterthought.
During this stage, confirm:
- Where will tablet stands be placed?
- Where will QR codes be visible?
- Is badge scanning easily accessible?
- Is there a comfortable consultation area for deeper discussions?
- Does the staff have a clear digital or manual system?
The layout must naturally support data collection. If lead capture feels awkward or forced, your team will hesitate and opportunities will slip away. Strategic integration ensures seamless interaction.
6️. Align Booth Design with Pre-Event Marketing
By now, your trade show marketing strategy should already be active. This is the time to connect marketing and design.
Examples of alignment:
- Promote a live demo schedule before the event.
- Invite prospects to visit at specific time slots.
- Tease a product launch happening exclusively at your booth.
- Offer appointment-based consultations.
When visitors know why they should come, footfall improves dramatically. A booth without promotional buildup depends entirely on random traffic, while a booth supported by marketing generates intentional visits.
7️. Finalise Technology and AV Planning Early
Technology failures damage credibility instantly.
Confirm in advance:
- Screen sizes and orientation
- Placement height for optimal visibility
- Lighting intensity and temperature
- Power supply load requirements
- Backup cables and adapters
- Internet connectivity stability
- Audio levels that attract without overwhelming
Always test your presentation files on the actual display format before the event. Never assume that everything will “just work.” Prepared exhibitors test, while unprepared exhibitors troubleshoot under pressure.
8️. Develop a Structured Booth Script
This is often ignored and it should not be. Your team represents your brand live, and messaging inconsistency creates confusion. Prepare structured communication levels:
- 10-Second Opening Line
Short, engaging, benefit-focused. - 30-Second Elevator Pitch
Clear explanation of your value proposition. - 2-Minute Detailed Explanation
For visitors showing genuine interest.
Key Qualifying Questions
What challenge are you currently facing?
- Are you evaluating vendors?
- What timeline are you working with?
When every team member communicates consistently, brand authority increases. Improvisation weakens positioning. Preparation strengthens credibility.
9️. Approve the 3D Design with Logic, Not Emotion
Before giving final approval, evaluate objectively:
- Does it clearly reflect our positioning?
- Is the visitor journey intuitive?
- Is the message readable from 3–5 meters away?
- Does it balance openness and structure?
- Is it aligned with our brand tone?
- Is it within budget parameters?
Never approve a stall because it “looks impressive.” Approve it because it supports your exhibition success framework. Design must convert attention into opportunity.
45-30 Days Before the Event – Marketing & Promotion Rollout
At this stage, your stall design is progressing, fabrication may have begun, graphics are being finalised, and logistics discussions are active. But now the real differentiator begins driving the right audience to your booth. Many exhibitors invest significantly in creative design yet allocate minimal effort to pre-event promotion. When footfall is low, they blame location, timing, or event quality. The truth is simpler traffic is not accidental, it is engineered. This phase determines whether you meet random visitors or decision-makers who are already interested in what you offer.
Shift Your Mindset: From 3-Day Event to 45-Day Campaign
Stop thinking of the exhibition as a three-day opportunity. Think of it as a structured marketing campaign that peaks at the event.
The most successful exhibitors begin audience engagement 30–45 days before the show. They build awareness, nurture interest, create intent, and convert that intent into scheduled booth visits.
This structured funnel looks like this:
Awareness → Interest → Appointment → Booth Visit → Follow-Up
When executed properly, the exhibition becomes the climax of a campaign — not the starting point.
Activate a Segmented Pre-Event Outreach Strategy
Begin by identifying and segmenting your audience:
- Existing clients who may attend
- Warm prospects already in discussion
- Cold but strategically relevant companies
- Industry partners or distributors
- High-value target accounts
Avoid sending one generic announcement to everyone. Segmented communication increases response rates dramatically. A current client should receive a different message than a cold prospect. A distributor should receive a different invitation than an enterprise buyer. Precision improves performance.
Launch a Structured Email Campaign
Email remains one of the most effective channels within any professional trade show marketing strategy when used strategically.
Your campaign should be phased, not one-off.
- First communication: Announcement
Confirm your participation. Share your booth number. Introduce what visitors can expect. - Second communication: Value-Based Invitation
Explain clearly what benefit they will gain by visiting. Offer a meeting slot. Provide a scheduling link to reduce friction. - Final communication: Reminder with Urgency
Highlight limited availability for demos or consultations. Reinforce the value.
Keep subject lines benefit-driven rather than promotional. Avoid “Visit us at Booth 32.” Instead focus on outcomes such as solving a specific challenge or previewing something new. When email drives pre-booked conversations, exhibition ROI improves significantly.
Use Social Platforms to Build Anticipation, Not Noise
Simply posting “We’re exhibiting!” is not a strategy.
Use social platforms to create anticipation and authority.
Share:
- Behind-the-scenes stall development
- Short demo previews
- Team introductions
- Problem-focused educational posts
- Countdown posts tied to a reveal
When your audience sees preparation and expertise, credibility builds before they even arrive at the venue.
The goal is not impressions. The goal is intent.
Pre-Schedule High-Value Meetings
Pre-Schedule High-Value Meetings. Top-performing exhibitors do not depend on walk-ins; they pre-book. Create a simple booking link with fixed 20-minute or 30-minute slots, allocate specific team members to handle confirmed appointments, and protect these time blocks. Even if only 25–30% of your booth interactions are pre-scheduled, you gain predictability. Predictability strengthens ROI, and it also allows your team to prepare customised conversations instead of generic pitches.
Develop a Clear Attraction Hook
Visitors need a reason to stop.
A stall alone is rarely enough.
Your hook could be:
- An exclusive product preview
- A live demo schedule
- An industry insights session
- A limited-time exhibition consultation
- A structured problem-solving discussion
The hook must align with your previously defined objective. If your goal is distributor expansion, your messaging should reflect partnership benefits. If your focus is product launch, your hook should spotlight innovation. Without a compelling reason to engage, even a premium stall struggles to convert attention into conversation.
Rethink Marketing Collateral
This is the time to rethink traditional brochures.
Most printed materials end up unread.
Instead of heavy catalogues, focus on concise and purposeful material:
- One-page value summaries
- Clear QR codes linking to detailed digital content
- Downloadable product sheets
- Structured case study snapshots
- Simple takeaway cards with your core message
Modern decision-makers prefer digital follow-up. Make it easy for them to access deeper information after the event.
Less paper. More precision.
Align Staff Messaging with Campaign Messaging
One of the most overlooked gaps in exhibition planning is alignment between marketing promises and booth conversations.
If your email campaign promotes innovation but your team only discusses pricing, trust erodes.
Your staff must clearly understand:
- Who you are targeting
- What message leads the conversation
- What the attraction hook is
- What qualifies as a strong lead
Consistency between pre-event messaging and on-site communication builds authority. Authority builds trust. Trust accelerates decisions.
Finalise Lead Capture Infrastructure
Before the event, confirm that your lead capture system is structured and tested.
Whether using tablets, badge scanners, QR-based forms, or CRM integration, ensure the process is seamless.
Data fields should not be random. Capture information that directly supports post-event sales follow-up:
- Role and decision authority
- Buying timeline
- Area of interest
- Budget readiness (if appropriate)
Structured data reduces friction later when the sales team begins outreach.
Poor data collection weakens follow-up efficiency.
Plan Content Moments During the Event
Think beyond the physical booth.
Exhibitions are also content opportunities.
Consider:
- Hosting short educational micro-sessions
- Recording expert insights from your team
- Capturing client testimonials
- Sharing live event updates
- Filming product demonstrations
These content pieces extend the life of your exhibition beyond the venue.
Instead of three days of visibility, you create weeks of post-event engagement.
The Strategic Importance of This Phase
Between 45–30 days before the event, the difference between average and high-performing exhibitors becomes visible. Average exhibitors focus on finalising graphics, while high-performing exhibitors focus on filling their booth with qualified conversations. Marketing during this window builds intent before the exhibition begins. When done correctly, footfall becomes targeted, conversations become relevant, leads become qualified, and ROI becomes measurable. This phase transforms your stall from a passive display into an active pipeline generator.
30–15 Days Before the Event – Production, Logistics & Operational Control
This is the phase where strategy meets reality. Your stall design has been approved, your marketing campaigns are running, and appointments may already be getting scheduled. Now everything depends on execution. Because no matter how strong your exhibition stall planning checklist looks on paper, weak logistics or poor coordination can undo months of preparation in a single day. This stage is about operational discipline, quality control, and risk prevention, and the companies that dominate exhibitions are not just creative, they are operationally sharp.
Move from Planning to Controlled Execution
Between 30–15 days before the event, your mindset must shift from ideation to control.
At this stage, you are managing:
- Production timelines
- Vendor coordination
- Shipping logistics
- Compliance requirements
- Staff readiness
- On-site performance systems
Small mistakes now have amplified consequences later. That is why milestone tracking becomes critical.
Monitor Stall Production with Structured Checkpoints
Your fabrication process should already be underway. However, progress updates alone are not enough.
Set defined internal milestones for review. For example:
- Structural framework completion
- Graphic printing and mounting
- Lighting installation
- AV integration testing
- Final quality inspection before packing
Request real-time photos and videos from the workshop. Review branding placement carefully. Confirm that logo proportions, spacing, and color consistency match your brand guidelines. A minor visual misalignment noticed today prevents public embarrassment on the show floor. Professional exhibitors treat this stage like a product launch rehearsal not a casual vendor update.
Conduct a Pre-Dispatch Quality Review
Before the stall leaves the workshop, conduct a structured quality review. Verify structural stability, check whether panels align seamlessly, confirm that lighting enhances visibility rather than creating glare, and ensure cable management is discreet and safe. If possible, conduct a virtual walkthrough with your fabrication partner and visualise how visitors will enter, move, and interact. This is your last controlled environment to correct mistakes without time pressure. On-site corrections are always more expensive financially and reputationally.
Lock Down Logistics with Zero Assumptions
Logistics is one of the most underestimated components of exhibition planning.
At this stage, confirm every detail in writing:
- Shipping departure date
- Expected arrival timeline
- Insurance coverage
- Venue loading dock procedures
- Installation crew access timings
- Storage area allocation
- Dismantling schedule
If your stall is being transported across borders, double-check customs documentation and paperwork well in advance. A delayed shipment creates stress, and a missing document creates chaos. Operational calm is built through confirmation, not optimism.
Reconfirm Venue Compliance Requirements
Every exhibition venue has technical guidelines. Ignoring them can result in forced last-minute modifications.
Revalidate:
- Power load approvals
- Internet bandwidth requests
- Rigging permissions
- Height restrictions
- Fire safety certifications
- Structural safety documentation
Many exhibitors discover compliance issues only during installation, when changes become costly and rushed. Control this now. Prepared exhibitors anticipate rules. Unprepared exhibitors react to them.
Finalise Team Structure and Accountability
As logistics stabilise, shift your attention to the human element. Your booth is not just a structure; it is a live performance space. Define clear responsibilities and avoid overlapping roles that create confusion. Someone should focus primarily on initial engagement and qualification, someone should handle detailed demonstrations, someone should manage pre-booked appointments, someone should ensure accurate lead data entry, and if you are creating live content, assign ownership of that too. When responsibilities are unclear, conversations become inconsistent. When responsibilities are structured, the booth feels coordinated and professional.
Conduct Structured Staff Training
This is not the time for improvisation.
Host at least one focused training session covering:
- A strong 10-second opening approach
- A clear 30-second value explanation
- Deeper product explanation flow
- Standard qualifying questions
- Objection-handling frameworks
- Lead scoring guidelines
- Competitive differentiation positioning
Run mock scenarios. Simulate difficult conversations. Practice transitions from curiosity to qualification. Confidence on the show floor is built through preparation off the floor. The goal is not memorised scripts, it is alignment and clarity.
Prepare an Operational Backup Kit
Operational friction often comes from small oversights. Prepare a compact on-site control kit including essential backups: power extensions, chargers, adapters, USB drives, printed documents, stationery, additional business cards, basic cleaning supplies, and refreshments for the team. When small problems arise, their preparation prevents emotional reactions. Calm teams perform better. Prepared teams stay calm.
Reconfirm Marketing and Sales Alignment
Before the event begins, review your messaging one final time.
Ensure that what your email campaigns promised is exactly what visitors will experience at the booth. Confirm that your attraction hook is clearly understood by the entire team. Reinforce your key value proposition and your primary call-to-action.
Inconsistent messaging confuses visitors and weakens credibility.
Consistency builds trust.
Trust builds pipelines.
Establish a Daily Performance Tracking Framework
High-performing exhibitors treat exhibitions as live campaigns, not static displays.
Before the event begins, define how you will measure daily performance.
Track:
- Total leads captured
- Number of qualified leads
- Appointments conducted
- Demo participation
- Serious buying conversations
- Strategic partnership discussions
Hold short daily review meetings at the end of each day during the event. Identify what is working and what needs adjustment.
Real-time optimization increases total results by the final day.
Why This Phase Determines Exhibition Success
Why This Phase Determines Exhibition Success. Between 30–15 days before the event, the margin for error shrinks. This is where operational discipline separates professionals from amateurs. Strong production oversight prevents design failures, clear logistics prevent installation chaos, structured staff training prevents inconsistent messaging, and performance tracking prevents missed opportunities. Creativity may attract attention, but operational control ensures delivery. This stage transforms months of planning into a controlled, confident execution environment, setting the foundation for a high-impact exhibition presence.
Final 14 Days Before the Event – Staff Rehearsal, Engagement Tactics & Psychological Readiness
The final two weeks before an exhibition are not meant for last-minute chaos; they are meant for refinement. At this point, your exhibition booth preparation timeline is nearly complete, the stall is fabricated, logistics are confirmed, marketing campaigns are running, and meetings may already be scheduled. Now the focus shifts to the single most powerful variable in exhibition success: people. Stalls do not close deals conversations do, and conversations are driven by preparation, confidence, and psychological readiness.
Turn Preparation into Performance
In these final 14 days, your objective is simply to eliminate uncertainty. Even the most impressive stall can underperform if the team lacks clarity, energy, or structure energy. High-performing exhibitors use this time to rehearse, align messaging, and sharpen engagement tactics. This stage is about transforming a prepared team into a confident, coordinated unit.
Run a Full Booth Simulation
Do not wait for the exhibition floor to test your approach.
Organise an internal rehearsal that simulates real conditions. Create scenarios that reflect what your team is likely to face:
- A busy booth with multiple visitors arriving at once
- A prospect asking difficult pricing questions
- A competitor gathering information
- A visitor who consumes time without genuine intent
- A media representative seeking quick insights
Practice how team members transition from greeting to qualification, from demo to consultation, and from conversation to lead capture. Rehearsal removes hesitation, hesitation reduces authority, and authority drives trust. Confidence on the exhibition floor is not accidental; it is rehearsed.
Refine the Three-Layer Conversation Structure
Your team must know how to adjust depth based on visitor engagement. Not every visitor deserves a five-minute explanation, and not every serious buyer wants a ten-second pitch. Train your team in a structured three-layer conversation approach: first, a sharp ten-second hook focused on benefits, not features, which should spark curiosity without technical overload; second, a concise one-minute overview explaining what you do, who you serve, and how you differentiate from competitors; third, a deeper dive tailored to serious prospects, including use cases, data, measurable outcomes, and pricing conversations if appropriate. This layered structure strengthens your exhibition lead generation strategy because it respects visitor energy while maintaining clarity. Structured communication outperforms improvisation.
Strengthen Engagement Psychology
Exhibitions are overwhelming environments. Visitors are constantly processing information, making quick decisions about where to stop and where to move on. Small psychological adjustments can significantly increase engagement. Encourage your team to maintain open body language. Standing confidently near the booth entrance rather than sitting inside signals approachability. Eye contact and a natural smile create comfort. Avoid using phones at the booth unless necessary. Visitors interpret disengagement instantly. Most importantly, open conversations with meaningful questions instead of generic greetings. Instead of asking, “Can I help you?”, ask, “What solutions are you exploring at this event?” or “What challenges are you looking to solve this year?”
Questions create dialogue.
Brochures create distance.
Reconfirm Lead Qualification Standards
Before the event begins, revisit your lead classification system.
Ensure every team member clearly understands what qualifies as a hot lead, a warm lead, and a low-priority contact. Define immediate follow-up actions for each category.
For example:
- High-priority prospects receive follow-up within 24 hours.
- Mid-level prospects enter a structured nurturing sequence.
- Low-priority contacts receive automated or informational follow-up.
Clear categorisation prevents post-event confusion and ensures that high-value opportunities are not delayed. Exhibition success is often determined after the event, not during it.
Introduce Micro-Engagement Triggers
In the final two weeks, refine small engagement triggers that increase dwell time and booth energy. This could include scheduling short demonstrations at fixed intervals, hosting quick educational insights, or offering focused consultations. When visitors sense activity and structure, curiosity increases. A dynamic booth attracts attention. A silent booth blends into the background. Energy is contagious on the exhibition floor.
Align Team Image and Brand Representation
Professional appearance and behavioural consistency significantly influence brand perception. Confirm dress code alignment. Ensure name badges are clear and visible. Reinforce expected tone of communication confident, knowledgeable, and consultative rather than aggressive. Visitors subconsciously assess brand credibility based on how your team behaves. Your people are your real brand identity during the event.
Perform a Final Technical Recheck
Even if technology has been tested before, verify again. Confirm presentation files open smoothly. Test video playback. Check QR codes for accuracy. Ensure CRM or lead capture tools sync properly. Prepare backup hotspots or offline alternatives if internet connectivity fails. Technology failures damage professionalism instantly. Redundancy protects reputation.
Prepare Mentally for Exhibition Dynamics
Exhibitions are unpredictable. Footfall may surge unexpectedly, certain hours may feel quiet, and competitors may attempt to compare aggressively. Train your team to remain composed in all situations, encourage proactive engagement during slower periods, and conduct structured reviews during peak times. Energy consistency matters. A calm, prepared team performs better than a reactive one.
Establish Daily Performance Huddles
Plan short, focused team huddles during the event. Each morning, set clear targets and remind the team of the day’s scheduled meetings and key messages. Each evening, review leads captured, evaluate what worked, and identify areas for improvement. These brief check-ins transform your stall from a static setup into a performance-driven unit. Continuous improvement over three days can significantly increase overall results.
The Real Advantage in the Final 14 Days
The last two weeks are not about adding new strategies; they are about sharpening execution. This is where preparation becomes confidence, confidence becomes authority, authority becomes trust, and trust becomes a pipeline. When your team is aligned, rehearsed, psychologically prepared, and technically ready, your exhibition presence feels controlled rather than chaotic. And that control is what separates average exhibitors from industry leaders.
During the Exhibition – Engagement, Lead Capture & Real-Time Performance Optimisation
The exhibition floor is live. The doors are open, visitors are walking, and competitors are watching. This is where strategy becomes performance. Your stall design has already done its job, and it has attracted attention; now your team must convert that attention into measurable business outcomes. Exhibitions are not passive branding exercises; they are dynamic, high-energy sales environments where awareness, responsiveness, and structure determine ROI. Professional exhibitors understand one truth: results are not accidental; they are engineered in real time.
Master the First Five Seconds
The first five seconds determine whether a visitor walks past or walks in.
Body language speaks before your team does. Standing confidently, maintaining open posture, making natural eye contact, and initiating conversation proactively creates immediate psychological comfort.
Avoid passive phrases like:
“Let me know if you need anything.”
Instead, open with intent:
“What solutions are you currently exploring?”
“What challenges are you facing in this area?”
These questions position your team as consultants, not salespeople. A strong opening line can increase meaningful engagement rates dramatically. At an exhibition, hesitation costs opportunities. Confidence captures them.
Implement a Structured Engagement Framework
High-performing booths do not rely on random conversations. They use a disciplined interaction model:
Engage → Qualify → Convert
Engage:
Start with a short, curiosity-driven hook that connects directly to your visitor’s industry or problem area.
Qualify:
Within the first two minutes, understand:
- Their role in the buying process
- Current evaluation status
- Budget influence
- Decision timeline
Qualification prevents wasted conversations and protects your team’s time.
Convert:
Once a prospect is validated, move them forward intentionally:
- A live demo
- A deeper technical discussion
- A scheduled post-event call
- A calendar-confirmed follow-up meeting
Structure transforms traffic into opportunity.
Capture Data With Discipline and Context
Many exhibitors make a critical mistake: they focus on scanning badges but ignore context.
A badge scan without conversation notes is incomplete data.
For every meaningful interaction, capture:
- Full name
- Company
- Designation
- Decision-making authority
- Project timeline
- Specific interest area
- Key objections or priorities discussed
Context increases post-event conversion rates significantly. When your sales team follows up referencing an exact pain point discussed at the booth, the conversation continues naturally instead of restarting from zero. Data discipline during the event directly impacts revenue after the event.
Score Leads in Real Time
Waiting until the event ends to sort leads is inefficient and risky.
Classify immediately:
- Hot: Decision-maker, active requirement, defined timeline
- Warm: Exploring options, medium-term interest
- Cold: General information seekers
Mark priority visibly in your CRM or tracking sheet. Real-time scoring ensures your sales team knows exactly where to focus within 48 hours after the exhibition.
Speed plus clarity equals higher conversion.
Use Micro-Demos to Create Controlled Momentum
When footfall slows, structure creates energy.
Short, scheduled micro-demos (5–10 minutes) can:
- Create small audience clusters
- Demonstrate authority
- Showcase product differentiation
- Restart booth momentum
Announce demo times clearly on screens or verbally invite nearby visitors. Clusters attract attention, attention attracts curiosity, and curiosity increases engagement. Momentum is contagious on the exhibition floor.
Monitor Performance Daily Not After the Event
Exhibitions are live campaigns. Live campaigns require monitoring.
At the end of each day, evaluate:
- Total leads captured
- Qualified lead percentage
- Meetings scheduled
- Demo participation rate
- Engagement-to-conversation ratio
If numbers fall below expectation:
- Refine opening scripts
- Increase proactive outreach
- Adjust qualifying questions
- Emphasise your strongest value proposition more clearly
Real-time adjustments can double results by day three compared to day one. Professional exhibitors optimise during the event not after it.
Capture Social Proof and Extend Floor Presence Digitally
Your exhibition presence should not end at the booth boundary.
During the event:
- Record short product demonstration clips
- Capture testimonials from visitors
- Photograph active booth moments
- Share live updates on social platforms
- Highlight key meetings or product interest
This content serves multiple purposes:
- Builds credibility
- Extends event reach
- Reinforces brand authority
- Supports post-event remarketing
An exhibition is not just a physical activation, it is a content opportunity.
Manage Energy Through Strategic Rotation
Exhibition days are long. Energy fluctuates.
Rotate staff intentionally to:
- Prevent fatigue
- Maintain enthusiasm
- Ensure consistent engagement levels
Visitors can sense low energy instantly. A disengaged team creates invisible barriers.
High-performing booths maintain consistent professional presence from opening to closing hour.
Energy is not optional, it is strategic.
Prioritise Lead Quality Over Volume
A crowded booth may look impressive.
But metrics matter.
It is better to capture:
80 qualified, opportunity-ready leads
Then:
400 unfiltered badge scans
Measure success by:
- Decision-maker interactions
- Sales-qualified leads
- Revenue pipeline potential
- Scheduled follow-up meetings
Exhibitions are investments. ROI is determined by opportunity value not footfall volume.
Post-Event – The 48-Hour Follow-Up System & ROI Measurement Framework
The exhibition floor may be empty, your stall may be dismantled, and your team may finally rest. But from a revenue perspective, this is where the real work begins. Many companies invest heavily in design, marketing, logistics, and staffing only to lose momentum after the event. Follow-up gets delayed, leads sit untouched, and generic email blasts replace personalised communication. Within a week, interest fades and competitors step in. If you want your exhibition investment to generate measurable ROI, the first 48 hours after the event are non-negotiable.
The First 24 Hours: Organise Before You Act
Before sending a single email or making a call, clean and structure your data.
Raw exhibition data is messy. You will likely have duplicate entries, incomplete information, unqualified contacts, and casual visitors mixed with decision-makers. Acting without organising creates confusion and weakens impact.
Start by:
- Removing duplicates
- Completing missing information where possible
- Eliminating clearly irrelevant contacts
- Adding context notes from booth conversations
Then the segment leads into clear categories: hot, warm, cold, and strategic partners or media. This structure ensures your sales team knows exactly where to focus and prevents high-potential leads from being lost in a generic outreach campaign. Organisation is not administrative work it is revenue protection.
The 48-Hour Rule: Speed Builds Authority
Hot leads must be contacted within 24 to 48 hours. Not with a template. Not with a mass newsletter.
With a personalised follow-up that references the exact conversation you had at the booth.
A strong follow-up should:
- Thank them for visiting
- Reference a specific challenge or requirement they mentioned
- Reconnect your solution to their need
- Suggest a clear next step (demo, call, proposal, meeting)
Speed communicates professionalism and seriousness. It signals that your company values the opportunity and operates with discipline. When follow-up is delayed beyond a few days, recall weakens and urgency disappears. In competitive industries, response speed alone can determine who wins the deal.
Build a Tiered Follow-Up System
Not every lead deserves the same intensity of effort. A structured, tiered strategy ensures resources are allocated wisely. Hot leads should receive immediate personal contact, a phone call, and a calendar-scheduled next step. These are active opportunities. Warm leads require nurturing personalised emails, relevant case studies, educational resources, and a follow-up call within a week. They are interested but not urgent. Cold leads should enter a structured nurturing cycle. They may not convert immediately, but consistent value-driven communication keeps your brand visible for future opportunities. Segmentation protects your team from wasting time while maximising long-term pipeline growth.
Measure Performance Beyond Surface Numbers
Exhibitions must be evaluated like business investments not branding exercises.
Start with core performance metrics:
- Total leads captured
- Percentage of qualified leads
- Meetings scheduled
- Pipeline value generated
- Deals closed
Then calculate financial return using a simple formula:
ROI = (Revenue Generated – Total Exhibition Cost) ÷ Total Exhibition Cost × 100
However, true evaluation goes deeper than immediate revenue.
Consider strategic gains:
- New partnerships initiated
- Market intelligence gathered
- Competitor insights observed
- Brand positioning strengthened
- Content assets created
Exhibitions generate both direct revenue and long-term strategic value. Measuring both provides a more accurate performance picture.
Conduct a Structured Internal Debrief
Within one week of the event, gather your sales, marketing, and operations teams for a performance review.
Discuss what genuinely worked and what did not:
- Which opening lines created engagement?
- What objections appeared repeatedly?
- Which product demonstrations attracted attention?
- Where did conversations lose momentum?
- Was booth traffic aligned with expectations?
Document insights clearly. Every exhibition provides intelligence. Companies that capture these insights systematically improve their next event significantly. Those who skip this step repeat the same mistakes. Continuous refinement separates industry leaders from occasional exhibitors.
Compare Budget Allocation Against Outcomes
Now evaluate financial efficiency.
Was the stall design investment justified by engagement quality?
Did pre-event marketing generate targeted traffic?
Were staffing levels optimal or excessive?
Was lead quality aligned with your exhibition objectives?
Smart exhibitors do not simply ask whether the event “felt successful.” They analyse whether each cost category delivered proportional value. Every exhibition should sharpen your budgeting strategy for the next one.
Turn the Event into a Content Engine
An exhibition generates more than leads; it generates content. Product demonstrations can become social media clips, visitor questions can become blog articles, common objections can strengthen sales enablement materials, and photos and testimonials can reinforce case studies. Repurposing exhibition assets extends the life of your investment far beyond the event dates. Instead of being a three-day activity, the exhibition becomes a multi-month marketing asset.
Build a 90-Day Nurturing Cycle
Not all opportunities close immediately. Many require months of consideration.
Develop a structured 90-day nurturing system that includes:
- Educational email sequences
- Case studies relevant to visitor industries
- Webinar invitations
- Product updates
- Occasional personalised check-ins
Consistency keeps your brand top-of-mind. Silence allows competitors to fill the gap.
Nurturing is not aggressive selling. It is a strategic presence.
KPIs, ROI Optimizations & Long-Term Exhibition Growth Strategy
Most exhibitors stop at follow-up. Smart exhibitors go one step further. They turn one successful event into a repeatable system. If your exhibition stall planning checklist helped you execute properly, this final section ensures continuous improvement, so every future exhibition performs better than the last.
1️. Move Beyond Basic ROI
Revenue alone doesn’t tell the full story.
Evaluate performance across three levels:
Level 1 – Immediate Metrics
- Leads generated
- Qualified leads
- Meetings booked
- Direct sales
Level 2 – Pipeline Metrics
- Opportunities created
- Proposal requests
- Deal progression rate
- Revenue forecast
Level 3 – Strategic Impact
- Brand visibility increase
- Market positioning
- Competitor insights
- Partnership discussions
Exhibitions create compound value. Measure accordingly.
2️. Calculate Cost Per Qualified Lead
Instead of only calculating cost per lead, refine it:
Cost per Qualified Lead = Total Exhibition Investment ÷ Number of Qualified Leads
This number gives you a clearer performance benchmark for future trade show marketing strategy decisions.
If your cost per qualified lead is lower than your digital campaign cost, exhibitions are highly efficient.
3️. Analyse Conversion Rate by Lead Category
Break results into:
- Hot lead conversion rate
- Warm lead conversion rate
- Cold lead nurturing performance
This helps refine your future qualification criteria.
For example: If warm leads convert well over time, your booth engagement approach may be working better than expected.
4️. Identify High-Impact Elements
Review which components drove the most value:
- Was it the live demo?
- The interactive screen?
- The staff approach style?
- The pre-booked appointments?
- The promotional offer?
This insight strengthens your next exhibition booth preparation timeline. Optimisation is built on clarity.
5️. Refine Messaging Based on Real Feedback
Exhibitions provide raw, honest feedback.
Analyse:
- Frequently asked questions
- Common objections
- Confusion points
- Repeated interest themes
These insights can improve:
- Website messaging
- Sales scripts
- Future booth graphics
- Marketing positioning
Your stall becomes a real-world testing lab.
6️. Build a Repeatable Exhibition Playbook
Document everything:
- Budget allocation
- Timeline milestones
- Vendor contacts
- Design lessons
- Marketing templates
- Staff scripts
- Follow-up workflows
Turn your experience into a standardised internal guide.
This reduces planning time for future events by up to 30-40%.
7️. Strengthen Pre-Event Strategy for Next Exhibition
Based on results, adjust:
- Promotion timing
- Offer clarity
- Appointment booking process
- Demo scheduling
- Lead capture system
Continuous iteration increases long-term ROI.
Exhibitions reward refinement.
8️. Integrate Exhibition Data into Broader Marketing Strategy
Your exhibition lead generation strategy should not operate in isolation.
Sync data with:
- CRM
- Email marketing platform
- Sales pipeline
- Retargeting campaigns
- Account-based marketing efforts
Visitors who interacted with your booth should see consistent messaging afterwards.
Alignment increases trust and conversion.
9️. Plan the Next Exhibition with Strategic Confidence
After evaluating results, decide:
- Should you scale stall size?
- Should you change positioning?
- Should you refine the target audience?
- Should you increase appointment-based outreach?
Growth decisions should be data-backed not emotional.
Frequently Asked Questions
1. What is the ideal timeline to plan an exhibition stall?
The ideal timeline is at least 90 days before the event. This allows time for goal setting, design approvals, vendor coordination, marketing, and staff training. Early planning reduces costs and improves overall ROI.
2. How much budget should be allocated for an exhibition stall?
Budget depends on booth size, customisation, location, and marketing efforts. It should cover design, space rental, logistics, staffing, and follow-up campaigns. Smart allocation across all stages ensures better returns than overspending on design alone.
3. What is included in an exhibition planning checklist?
A checklist includes objective setting, budgeting, booth design, vendor coordination, marketing, staff training, and lead capture setup. It also covers on-site execution and post-event follow-up. Structured planning prevents costly mistakes.
4. How can I maximise ROI from a trade show?
Set measurable goals, train staff to qualify leads, and use structured data capture systems. Follow up within 48 hours with personalised communication. ROI depends more on planning and follow-up than booth size.
5. What are common mistakes exhibitors make?
Late planning, poor staff training, and focusing only on visuals are common mistakes. Many fail to qualify leads or follow up quickly. Most failures happen due to weak processes, not weak marketing.
6. How early should marketing start before an exhibition?
Marketing should begin 30–60 days before the event. Use email campaigns, social media, and appointment scheduling to attract targeted visitors. Pre-booked meetings significantly increase success rates.
7. Is a custom stall better than a modular stall?
Custom stalls create strong brand impact and are ideal for launches. Modular stalls are cost-efficient and reusable for multiple events. The right choice depends on strategy and budget.
8. How do I measure exhibition success?
Measure qualified leads, cost per lead, revenue generated, and pipeline value. Also evaluate brand exposure and partnerships created. Track both short-term and long-term impact for accurate ROI.
9. What is the 48-hour follow-up rule?
Hot leads should be contacted within 24–48 hours after the event. Personalised follow-up improves conversion significantly. Speed shows professionalism and maintains momentum.
10. How important is staff training for exhibition success?
Staff training directly impacts lead quality and engagement. Teams should know how to open qualified prospects, conversations, and handle objections. A trained team converts traffic into real opportunities.
Conclusion: Turning Exhibitions into a Predictable Growth Engine
Exhibitions are not expensive, unplanned exhibitions are. When you start early, define clear objectives, align stall design with your business goals, train your team, and build a structured pre-event and post-event strategy, exhibitions transform from uncertain marketing expenses into powerful revenue-generating channels. The difference between average exhibitors and high-performing exhibitors is not booth size or visual complexity; it is preparation depth and execution discipline. A well-planned exhibition attracts meaningful conversations, while a structured follow-up system converts those conversations into long-term business opportunities.
When strategy, design, marketing, staff readiness, and data-driven follow-up work together, exhibitions become a predictable growth engine that supports brand visibility, pipeline creation, and partnership development. Exhibition success is not about simply participating, it is about showing up with purpose, clarity, and complete preparation.